One-Click Package Deployment Guide
Disclaimer:
- This tutorial is provided for assistance only. If your account is banned or suffers other losses due to violation of platform official rules, this tutorial assumes no responsibility.
Suggestion: If you encounter problems you don't understand, make good use of search engines (such as Bing/Baidu) to find answers, or seek help from DeepSeek, or ask in the group chat.
You can also refer to: FAQ
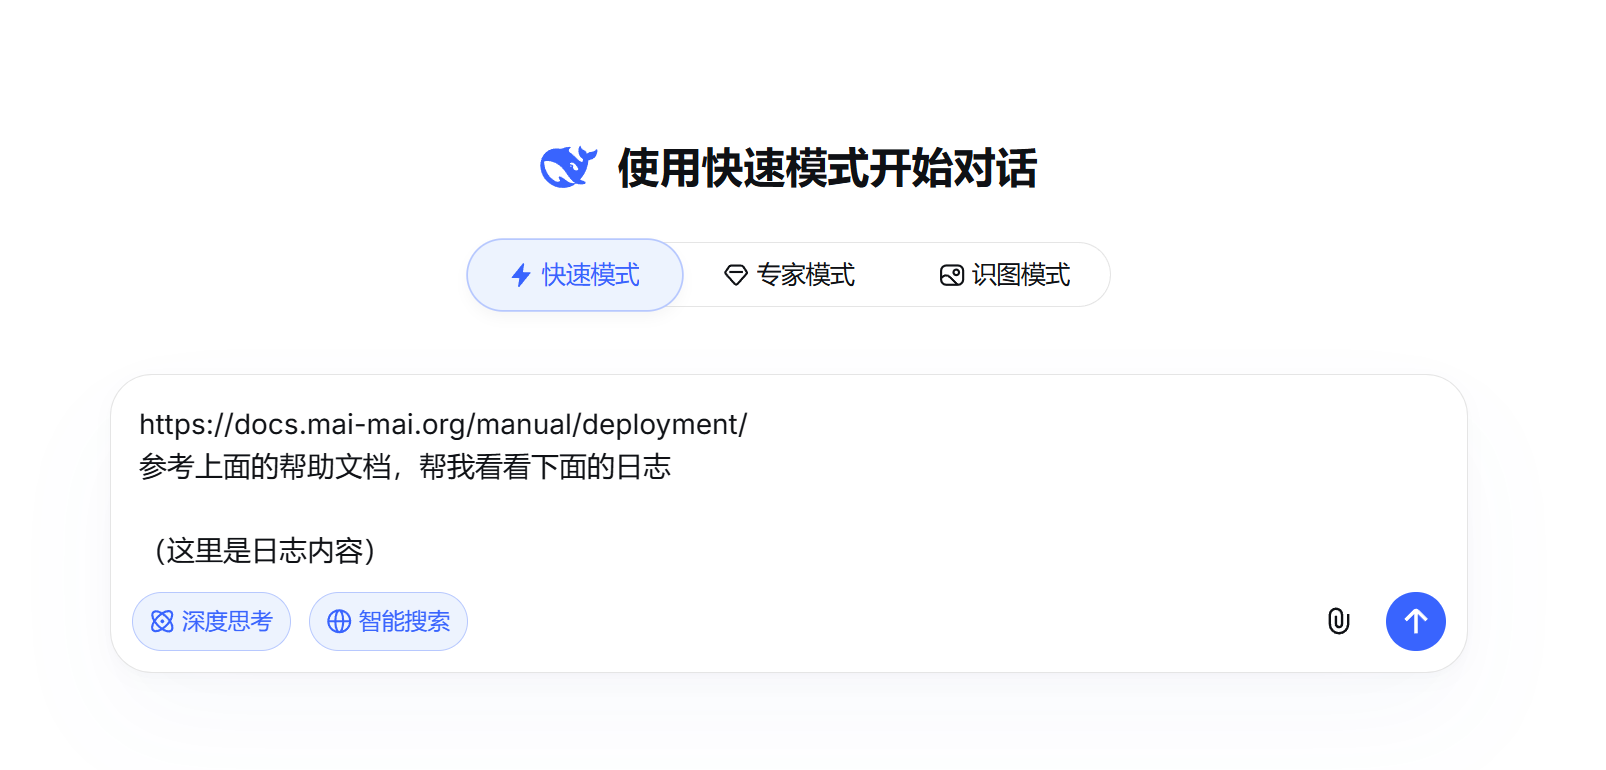 (Include the link to this document, remember to enable
 Deep Thinking and Web Search, as shown in the image, ask DeepSeek about log issues)
https://docs.mai-mai.org/manual/deployment/
Referring to the help document above, please help me look at the logs below
Preparation
- Ensure your system version is at least Windows 10 (if your system version is Win7 or even lower, you should give up now)
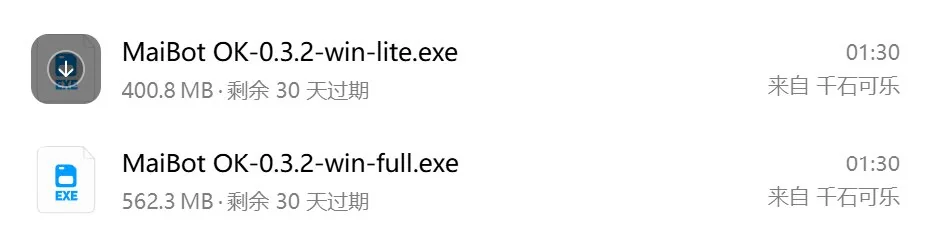
- Prepare a downloaded Onekey package (can be obtained from group files or Github; here we use version 0.3.2 full for demonstration (interface may vary due to version updates, use what you see as the standard))
The lite version does not include Python dependencies, which need to be installed later within the software. Installation location: Settings - Module Update
Assuming you have successfully obtained the installation package, as shown in the image, right-click the file and select Open file location

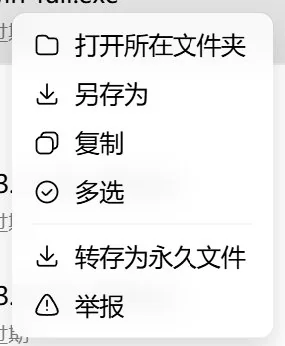

Double-click to install, then click Next Next Next... (After installation, the home page should look something like this)
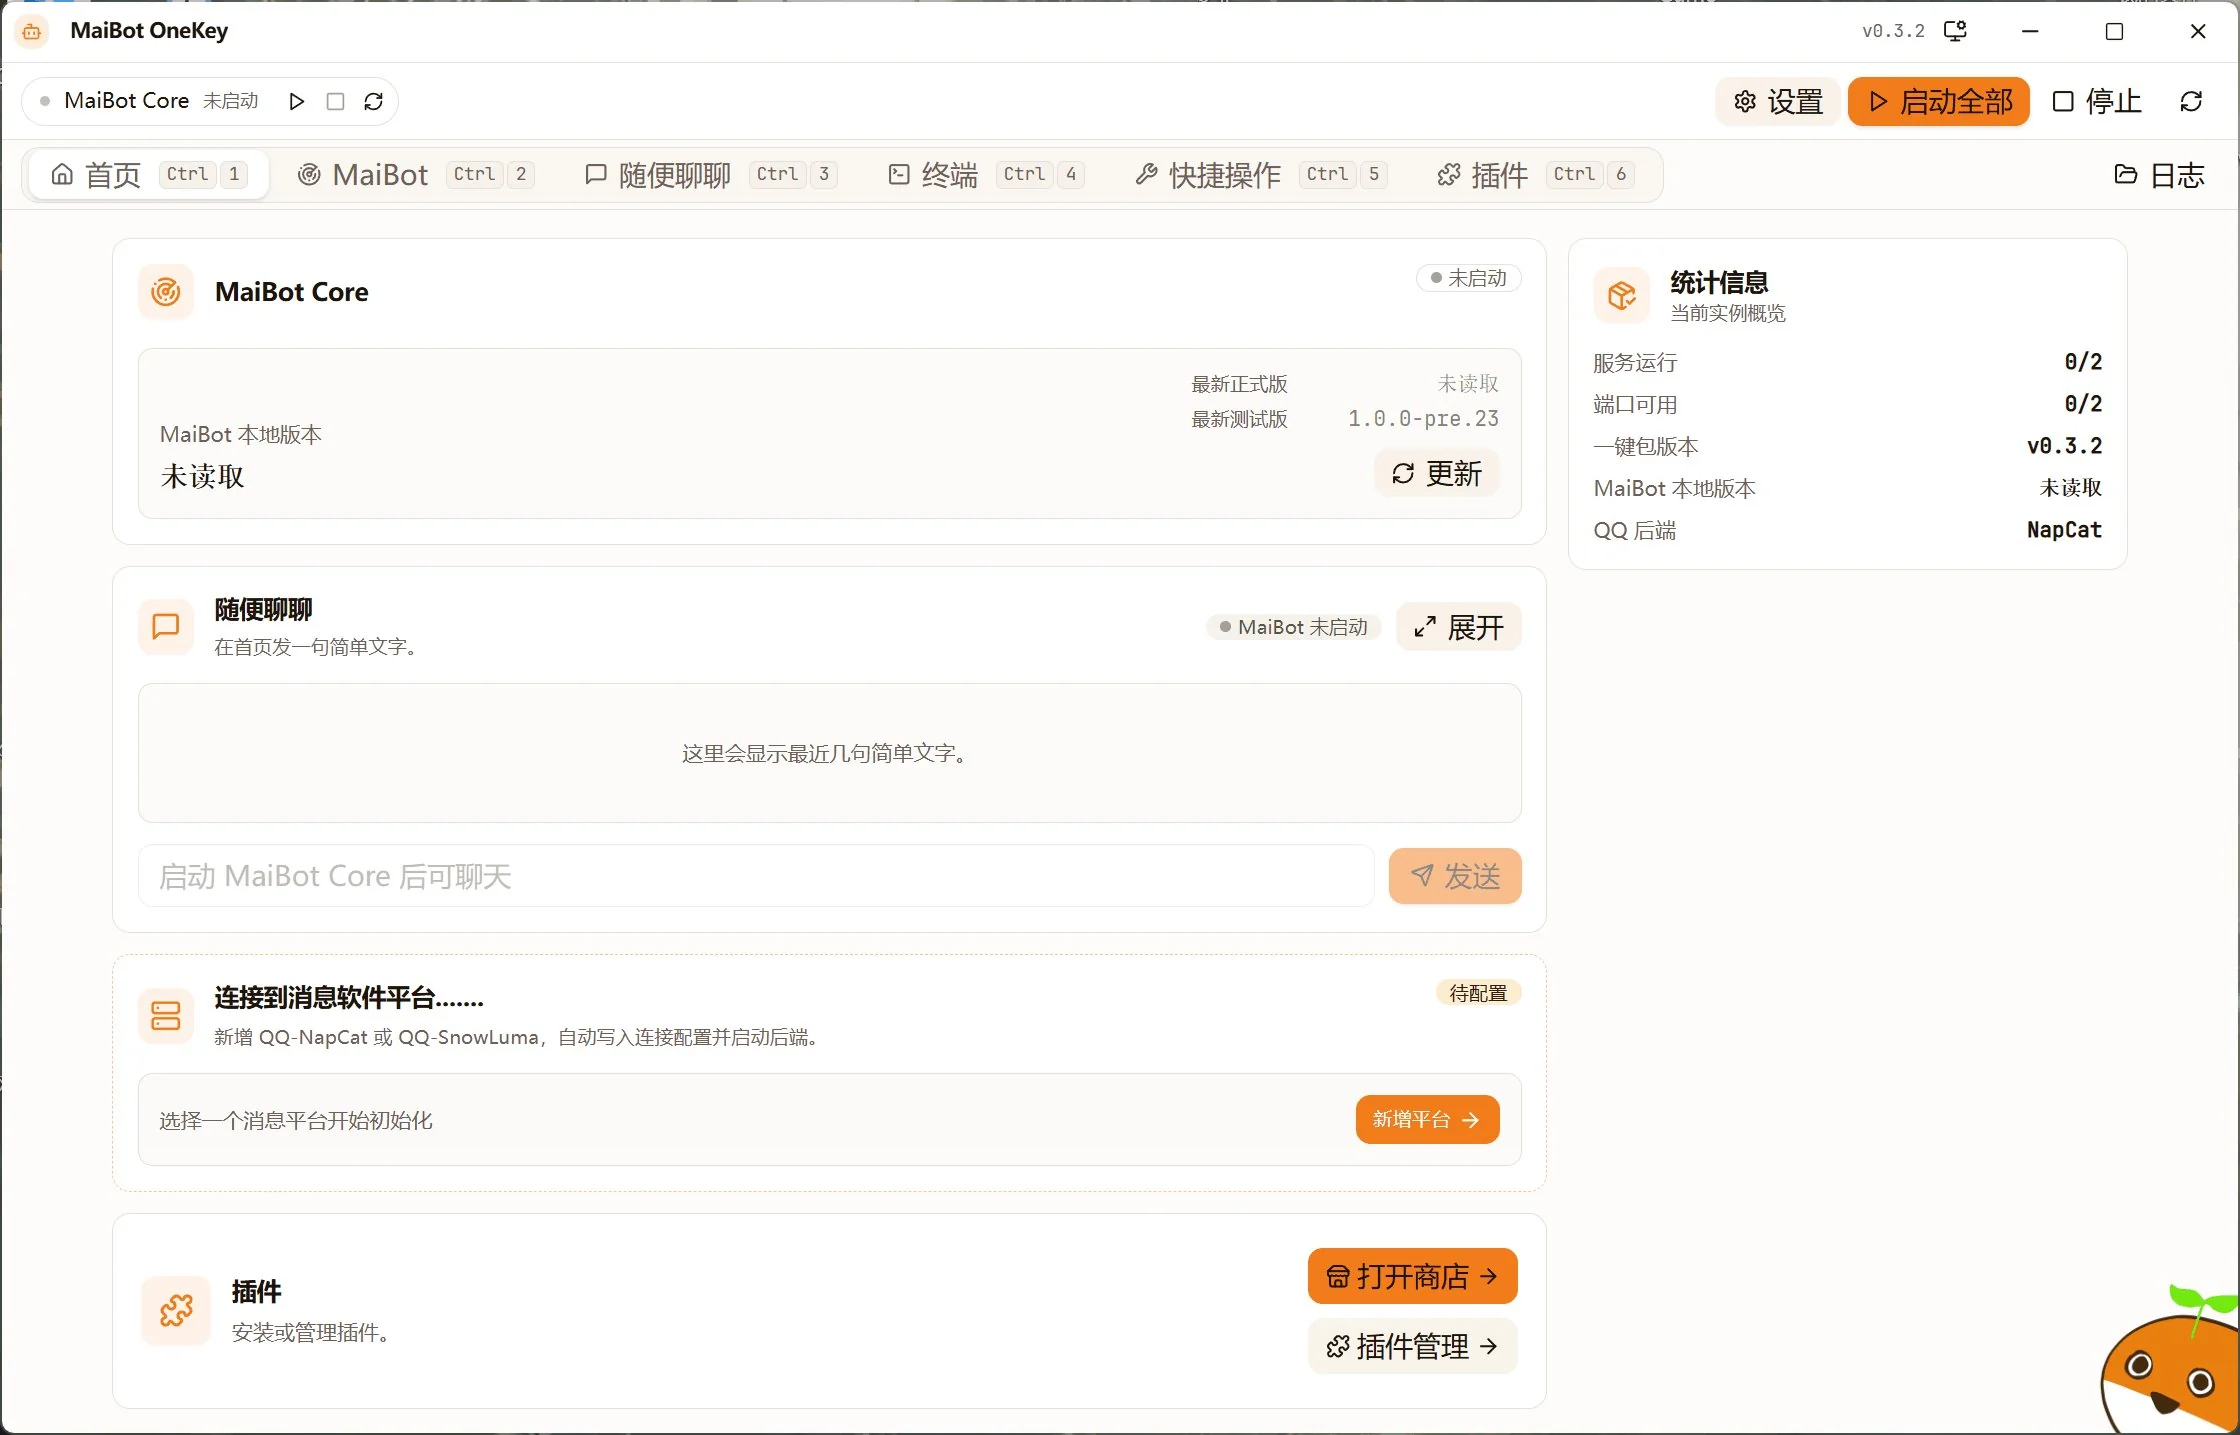
Next, click
Updateto update MaiBot to the latest test version (1.0.0)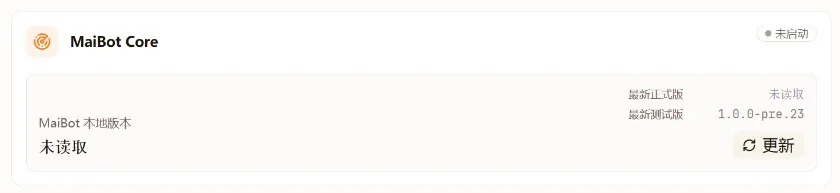
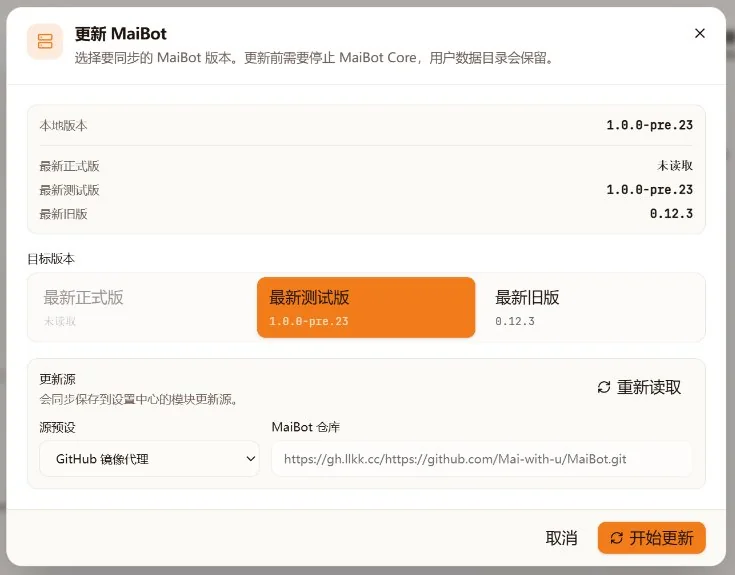
Click
Start Updateto update the local version to the latest version (mine is already updated)
Connect to QQ
Next, let's connect to QQ. Click
Add Platform
I will use NapCat for demonstration here. It is recommended to register a QQ alt account for the bot
(: Setting up a bot may lead to QQ !! Do not use your main account!! Do not use your daily QQ account!!)
Enter the QQ number you have prepared for the bot to use, then click Configure and Start
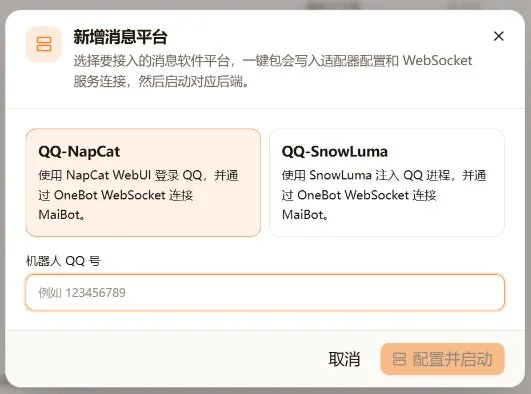
Then this interface will pop up. Don't rush to configure the whitelist yet; we will configure it in the Web UI later. For now, click
Save and Closein the bottom right corner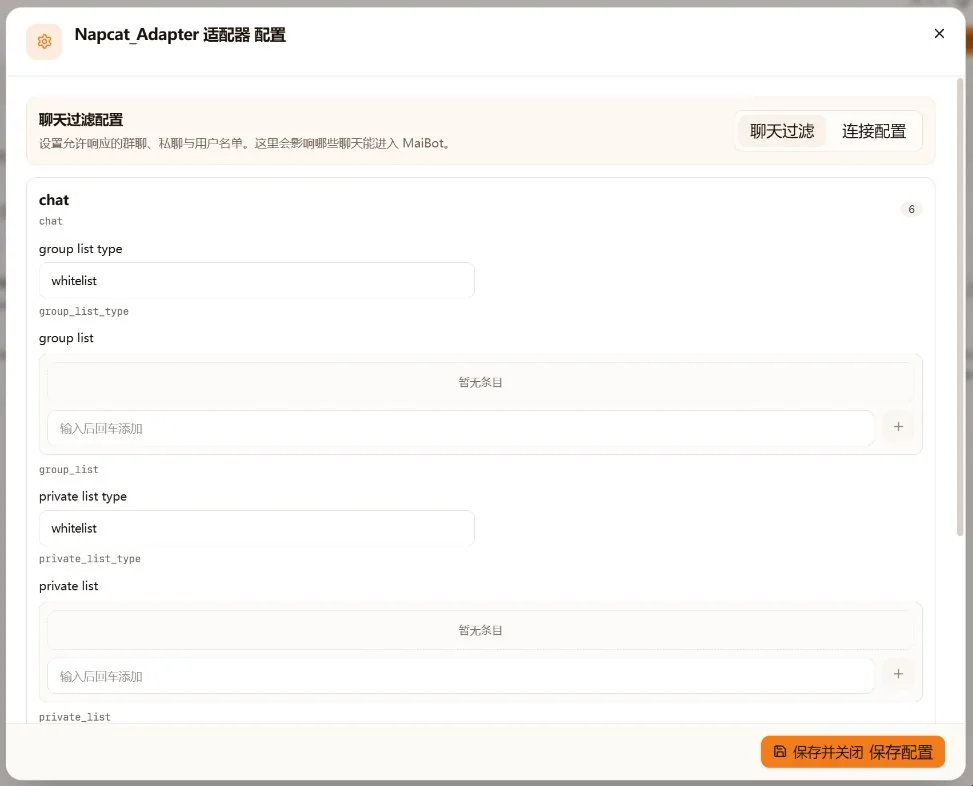
Then we click Terminal

Then click NapCat, open QQ on your phone, switch to the QQ account used by the bot, and scan the QR code to log in
Switch to the MaiBot page and follow the first-time configuration wizard to complete the setup (you can also click the button on the right to open the Web UI in the browser)

Great! We have completed the one-click package configuration. Next is to enable our bot to receive messages normally
(Here we assume you have already successfully configured the model in Model Management. For how to configure model providers, please search for tutorials online; for how to configure model features, please refer to FAQ)
We need to configure the Napcat whitelist. First, click Plugin Management
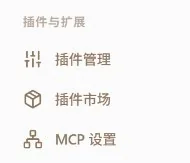
Click the Napcat_Adapter adapter

Click Add Item, enter the group number or user QQ number. In whitelist mode, the bot can only receive messages from groups or private chats in the list; in blacklist mode, it blocks groups or private chats in the list
It is recommended to first add another account as a friend of the bot's QQ for testing, and add more whitelists after confirming normal functionality
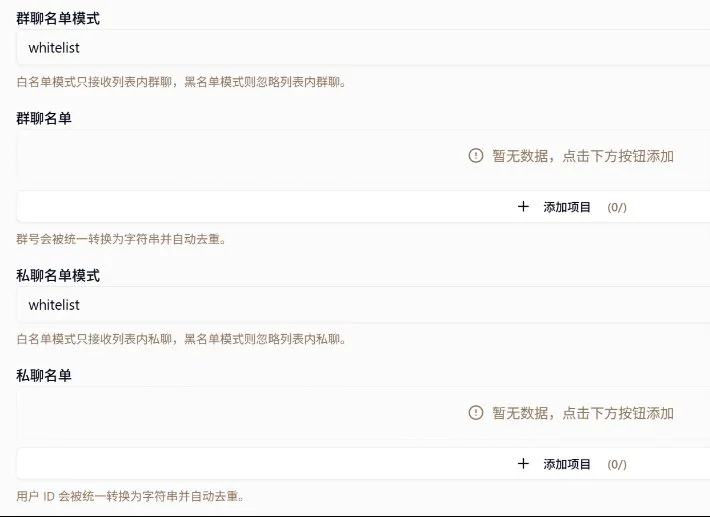
Finally, don't forget to save the plugin settings

Next, you can check the logs in WebUI - Log Viewer (the menu on the left can be scrolled, remember to scroll down if you don't see it) or in Software - Terminal - MaiBot Core. If the log shows
Unified WebSocket client connectedand successfully receives messages, it means NapCat connection is successfulFinally, welcome to start your MaiBot journey!